Configure hCaptcha
This guide explains how to create an hCaptcha site and connect it to Veekay Captcha Shield.
Veekay Captcha Shield supports:
- Checkbox — default
- Invisible
Veekay Captcha Shield controls how hCaptcha is presented on protected forms. hCaptcha account and site-key settings continue to control provider-side behavior such as challenge behavior and difficulty.
Before you begin
You need:
- an hCaptcha account;
- a WordPress administrator account;
- Veekay Captcha Shield installed and activated;
- the hostname where hCaptcha will run.
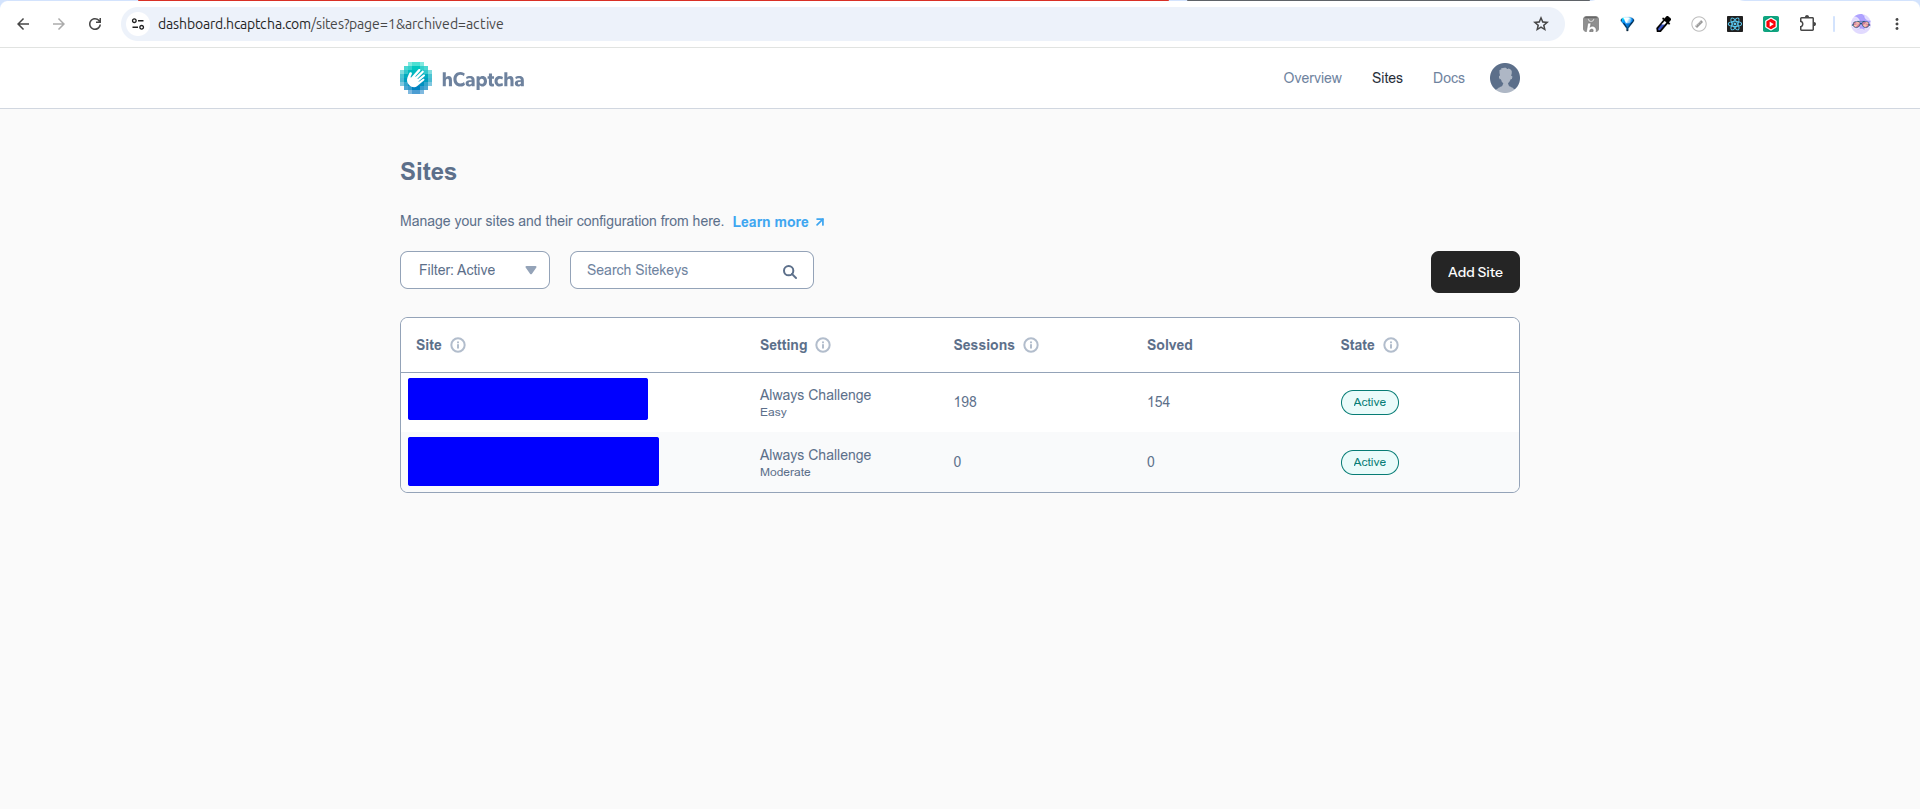
1. Open the hCaptcha Sites dashboard
Sign in to the hCaptcha dashboard and open Sites.
Select Add Site to create a new site configuration.
2. Create the site
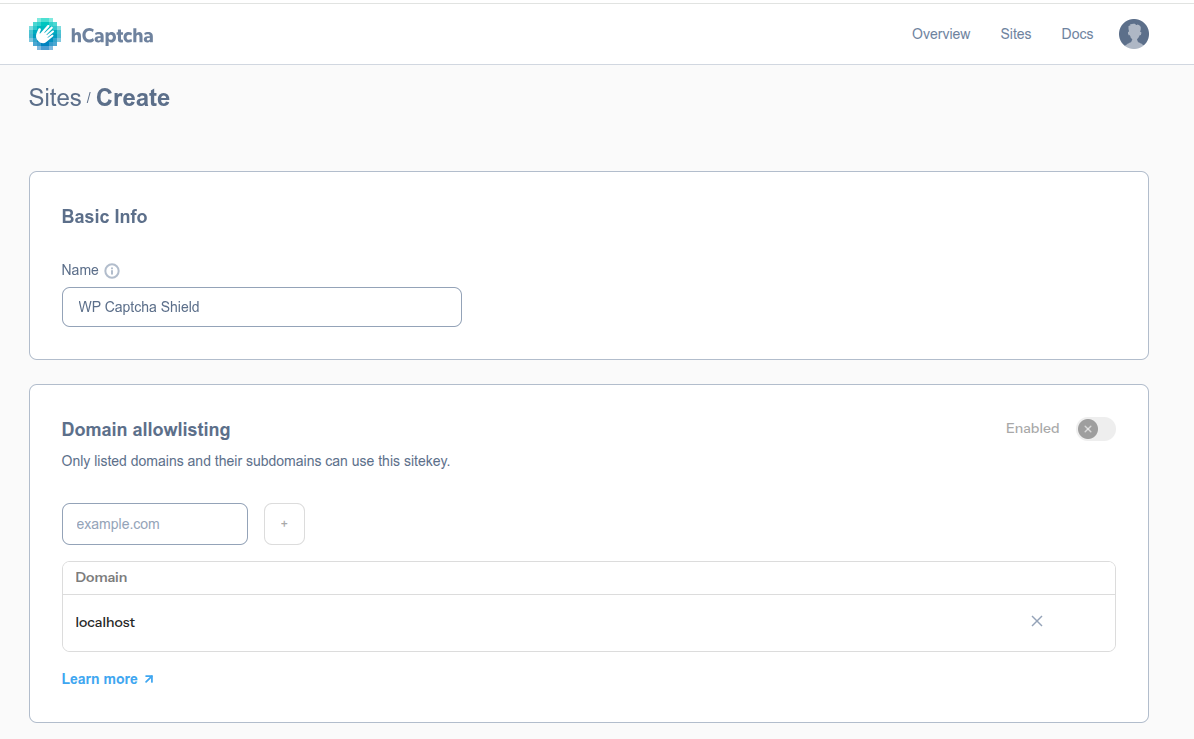
Enter a descriptive name for the site.
If you use domain allowlisting, add the hostname where Veekay Captcha Shield will run.
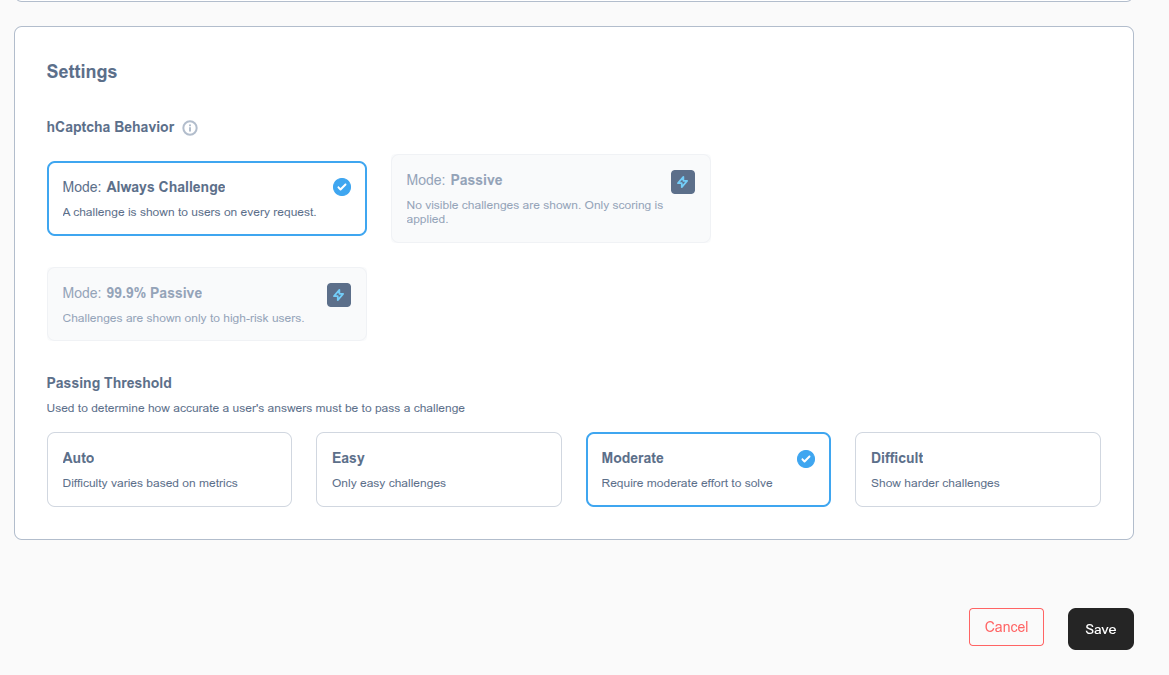
Configure the hCaptcha behavior and passing threshold appropriate for your site, then save the configuration.
These are hCaptcha-side settings. They are separate from the Checkbox and Invisible display modes configured in Veekay Captcha Shield.
3. Copy the site key
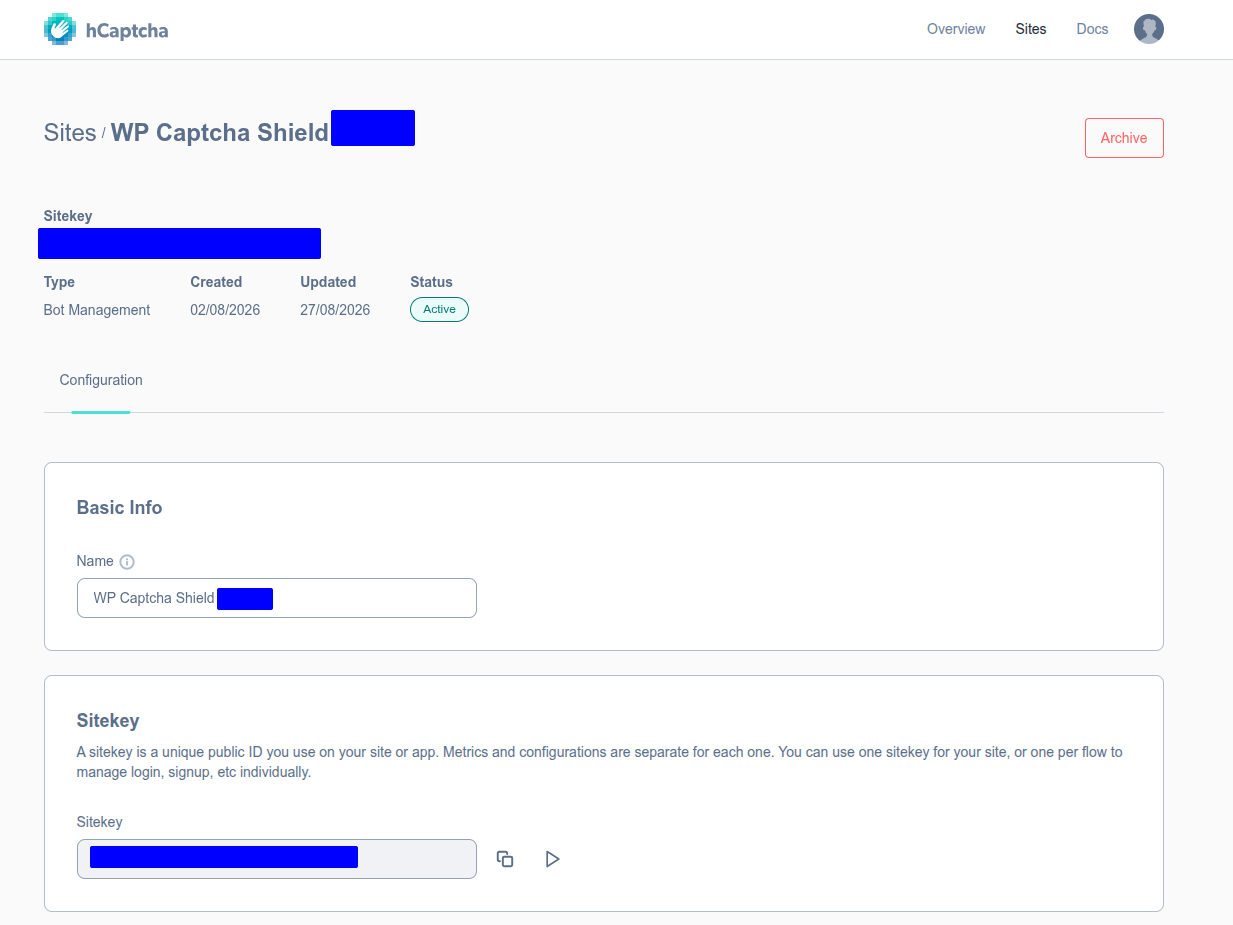
Open the site you created.
The Sitekey is the public identifier used by Veekay Captcha Shield to load hCaptcha for protected forms.
Copy the site key.
4. Copy the secret key
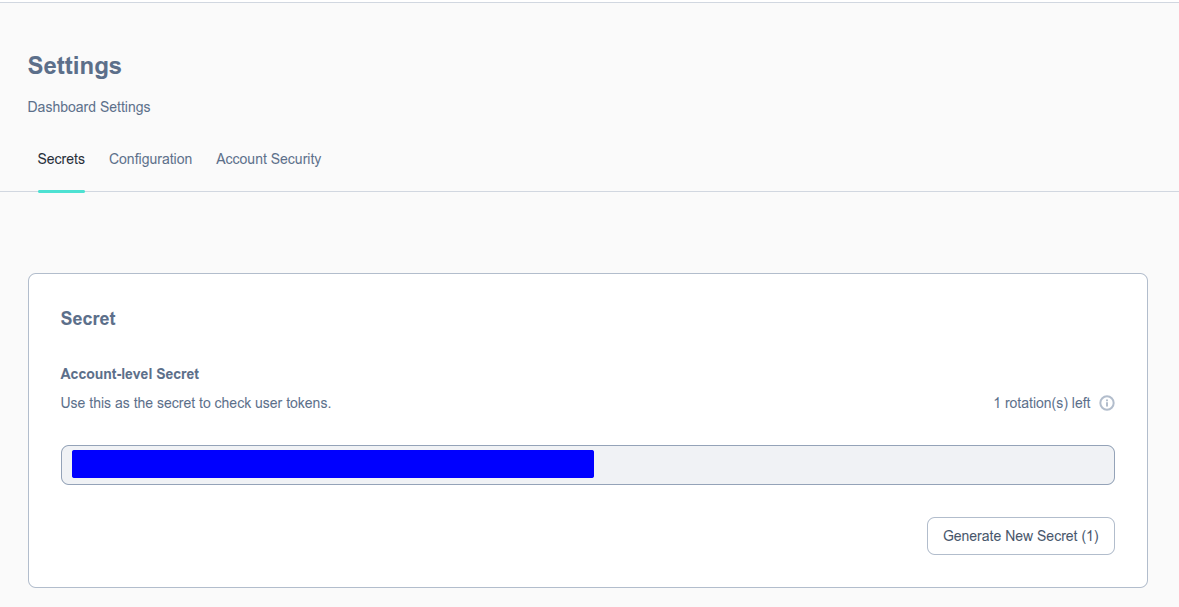
Open the hCaptcha dashboard settings and select the Secrets section.
Copy the account-level secret used to verify submitted hCaptcha tokens.
Keep this value private.
5. Configure hCaptcha in Veekay Captcha Shield
In WordPress, go to:
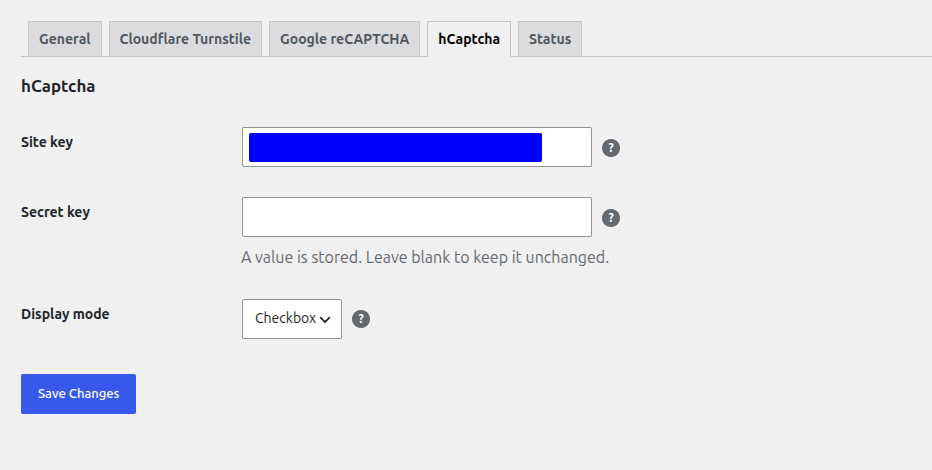
Settings → Veekay Captcha ShieldOpen the hCaptcha tab.
Enter:
- the Site key from the hCaptcha site;
- the Secret key from the hCaptcha dashboard.
Then select the Display mode.
Available modes are:
Checkbox
Displays the hCaptcha checkbox interface.
Checkbox is the default hCaptcha display mode in Veekay Captcha Shield.
Invisible
Runs hCaptcha without displaying the normal checkbox.
hCaptcha may still require visitor interaction when additional verification is needed.
Select Save Changes after configuring the provider.
6. Enable hCaptcha for protected forms
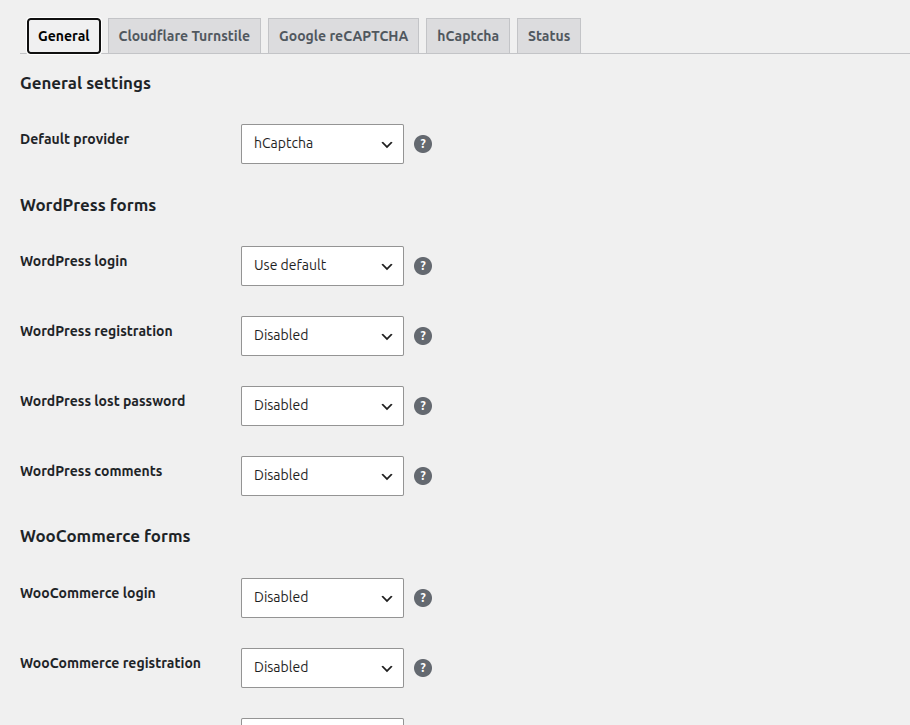
Open the General tab.
You can:
- select hCaptcha as the global default provider;
- set a form to Use default so it inherits hCaptcha; or
- select hCaptcha directly for an individual supported form.
You can also leave CAPTCHA disabled for forms that should not use protection.
For the complete provider-selection model, see the Form setup guide.
7. Test hCaptcha
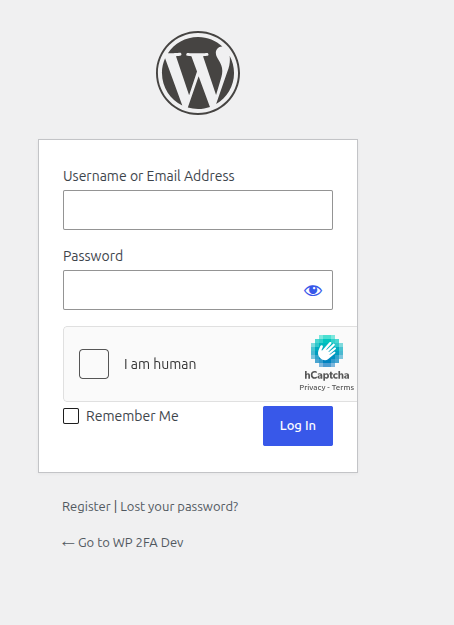
Open a protected form in a private browser session.
For Checkbox mode, confirm that the hCaptcha checkbox appears on the form.
Submit the form and confirm that:
- successful hCaptcha verification allows the protected action;
- failed verification rejects the protected action;
- the expected hCaptcha integration loads for the selected form.
For Invisible mode, test the complete form submission rather than relying on a visible widget.
For release or production validation, test hCaptcha on a real hostname. Localhost behavior is not a reliable substitute for real-host validation, especially for Invisible mode.
Troubleshooting
If hCaptcha does not load or verification fails, confirm:
- the site key is correct;
- the secret key is correct;
- the hostname is allowed by the hCaptcha site configuration;
- the expected display mode is selected in Veekay Captcha Shield;
- outbound HTTP requests from WordPress are allowed;
- browser or Content Security Policy restrictions are not blocking hCaptcha;
- optimization or security plugins are not interfering with the provider scripts.
See the main Troubleshooting guide for additional checks.